Monday, September 28, 2009

The Mega Post… Moonscape Finished

moonscape craters

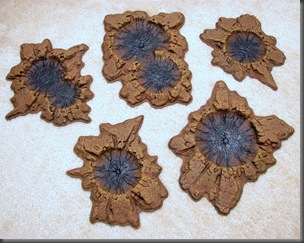
I finished up my first set of Moonscape craters tonight.  I have to say… The results are better than anticipated.

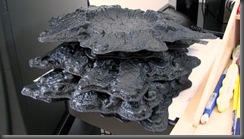
I wanted these to match my Realm of Battle Gameboard so I opted for the blasted dirt look rather than the gray up heaved bed-rock scheme.  The colours are those used in the Citadel Scenery Pack and the edges were textured using the Vallejo Black Lava.  Here’s a picture of them sitting on my desk after being primed.  The Black Lava does a nice job to cover up those horrid and unsightly flat edges.

moonscape

After priming them black I used the Citadel spray gun and applied on a nice even coat of brown over the whole crater.  I then used a large flat drybrush to make the black blast area in the center and then drybrushed Ochre brown over the outer edges.  Finally I applied Devlan Mud wash to the deepest crevasses.

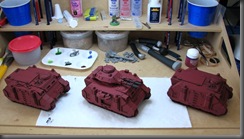
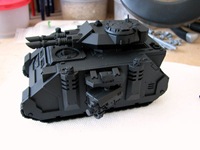
Here are some other projects that I am slowly working on.  Three tanks for my Space Marine army.  I’ve not done much other than prime them and use the spray gun to give them a coat of Mechrite Red, but it’s a start.

tanks

squad x

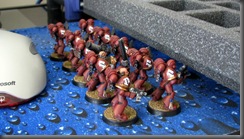
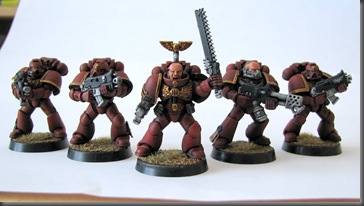
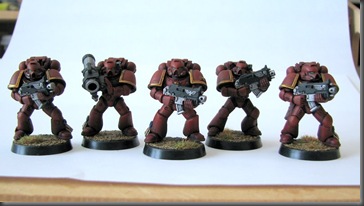
My most recently painted Space Marine squad got their decals and were designated tactical squad no. 10.

I assembled my Shrine of the Aquila.  Honestly, I had forgotten I bought the thing.  I was under the bed pulling out some paints and such for the Moonscape and there it was.  I’ll most likely paint it up to match the picture on the box, but somehow tie it in to the rest of my buildings.  The Shrine is HUGE…  Frosty the Snow Marine gives you size comparison.

shrine 

Well, I’m afraid that’s all for now.  Thanks for stopping by.  Cheers!  :)

Friday, September 18, 2009

The Golden Aquila Rating System

Golden Aquila 5
I've posted a few product reviews where I summarize the product with a rating measured in golden Aquila's. The ratings are from zero to five and go in half Aquila increments. I figured it would be nice of me to offer the images I use for download. This way anyone who would like to make reviews of anything pertaining to the 40K universe can do so in style. ;)


- Download The Golden Aquila Rating System -

Sunday, September 13, 2009

Magnetized Predator Sponsons

I magnetized the sponsons on my Predator about a week ago.  I finished assembling it and then primed it black before realizing that I had not made a blog post about it.  It’s a bit late to really give a proper walk through, but better late then never I suppose.  My apologies if this all seems a bit confusing.

Fortunately magnetizing Predator sponsons is probably one of the easiest things to magnetize as there’s very little modification needed and no drilling necessary.

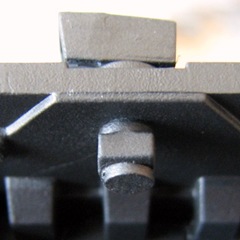
I started by clipping the off the flat extension that goes into the gun right below the block portion.  A 1/8” magnet fits perfectly onto its surface.

011

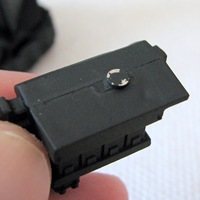
I then cut a little piece of 1/8” thick plasticard to fill in the gap where the extension would have gone into the guns and glued another 1/8” magnet, centered on top of what was the hole.  I chipped away some of the primer so you can see the magnet a bit better and if you look closely you can see the outline of the plasticard piece around it.

003 006

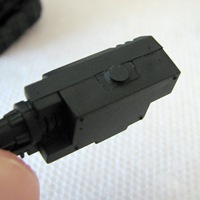
Doing it this way still allows for 180 degrees of rotation.  It does however, prevent the gun from pointing up or down, but really, just how important is it that the gun be able to point up or down?  In my opinion… It’s not important at all.

Using the 1/8” magnets was perfect because it placed the guns at almost the exact same height as the non modified part.

002

 007 009

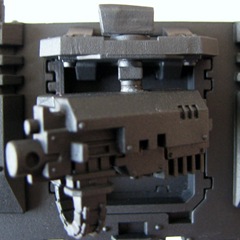
I did have the turret magnetized also, but it was rather flimsy so I’ll not bother going into detail how I did it.  After some consideration I decided to just glue the twin-link lascannon into place.  Honestly, I can not see myself ever using the autocannon and should I some day decide to… There’s always ‘counts as’.

Thanks for stopping by.  Cheers!

Friday, September 11, 2009

Battle Foam Space Hulk Trays

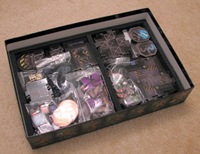
I got my Space Hulk trays from Battle Foam tonight and as soon as I could I put them to use.  The trays fit very nicely into the Space Hulk box which I have to say is the nicest thing about them.

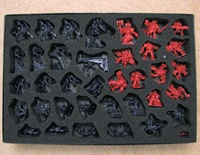
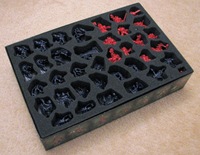
Model Tray – First, this tray is a must have for anyone that intends to paint the models.  The model tray amazingly is able to fit all 12 Terminators and 22 Genestealers albeit very snugly, but this is to be expected.  Trying to figure out what model goes where and how it fits can be a bit of a chore.  Battle Foam does give you a black & white print out of where things go, but it’s a Xerox copy and is a bit tough to interpret.  Once I figured it out I immediately took a picture with my cell phone so I’ll always have it handy, even if I travel to a friends house.  If you’re masochistic and  up for a puzzle challenge than you could try to figure it out on your own… Good luck if you try.

battle foam space hulk model tray top battle foam space hulk model tray angle

Some of the Genestealers at the very top stick up a bit, but nothing too bad.  Once the box top is on it doesn’t matter.

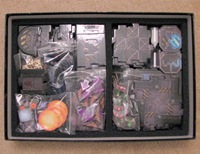
Game Tray – The game tray is just as much a puzzle as the model tray.  It took me a awhile to figure out how to arrange all of the pieces so that nothing came up to high and made the model tray stick out.  Once everything was in place I again took a picture so I’ll have an idea of how to put it all back in.  Oh yea, the larger than life Mission Status Display and books do not fit.  They’ll need to be placed either on the very top or in between the trays.

battle foam space hulk game tray top battle foam space hulk game tray angle

What to look out for – Because the model tray has such tight tolerances, the Genestealers claws snag the foam.  Over time I can see this being an issue as  the foam will get shredded.  The game tray (at least mine) had hair thin stands of glue all over the inner bottom portion where the corridor pieces go.  I didn’t think much of it at first, but amidst my fumbling around trying to make things fit I found pieces sticking together.  It was the glue and it did not come off, so be warned and be careful.

Conclusion – Despite the whole glue ordeal and knowing that eventually the Genestealers will not only tear the Terminators to bits, but also my model try… I give this product 3.5 Golden Aquila’s out of 5.

Golden Aquila 3.5

Saturday, September 5, 2009

The New Tactical Squad - Finished

Alas I have brought my Space Marine army back to its full strength.  I completed the tactical squad that’s replacing what I’ve dubbed my ‘snow marines’.  Not familiar with that story?  Click here to check out Frosty and his friends.

I’ve decided that this squad isn’t going to directly replace the old one.  I don’t want them to share the same fate or be damned by relation.  This squad will be roman numeral X once I get the decals on.  “But Chris, the title of the post says ‘finished’.”  Ah, right you are and there’s a reason, all of which will be explained in a later blog post.

Without further rambling… On to the pictures.

tactical squad x 01tactical squad x 02

Comments and criticism welcome.  Thanks for stopping.  Cheers!

Recommended Posts

Blog Widget by LinkWithin