Saturday, April 25, 2009

They Just Keep Getting Better and Better

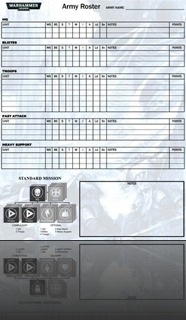
large_roster_form_final_Page_1 large_roster_form_final_Page_2

- Download Large Roster Sheet -

I think you guys are really going to like this one.  It’s a two page roster sheet large enough to fit the full Force Organization Chart plus space to fit six walkers, six vehicles and loads of weapons.  IT GETS BETTER… as I have fixed all the bugs of past roster sheets – No more tabbing to the next box and ending up 3 lines down.  BETTER STILL… the form allows for self fitting text – If there’s not enough room in the box just keep typing and the text will automatically resize itself to fit instead of scrolling to the right.  Plus the second page has a Total Points box that will automatically add up your entries, saving you the hassle of figuring out what your points are at once everything is filled in.

Please let me know what you think and if you have any comments on how I can make it better.  Duplex color  laser printing really makes this Roster Sheet shine, but it is not necessary.  Thank you stopping by.

- See and get other roster sheets here -

Monday, April 13, 2009

Extracting Backgrounds Quickly & Easily

Not to long ago I made a post on Dakka Dakka about removing the background from an image using Adobe Photoshop. The more I thought about it the more I figured it would be nice to post it here as well. This particular tutorial uses version CS2, but applies to all versions 5.5 to present.

NOTE: If you are using CS4 you will need to install the ExtractPlus plug-in from the ‘Goodies’ folder located on the installation CD or download it from the Adobe website.

The Extraction Tool in Adobe Photoshop is a powerful tool that allow you to 'extract' a part of the image. Most commonly it's used for pulling out the primary object(s) from an image / removing the background.

Here's how it works...

Click Filter then Extract
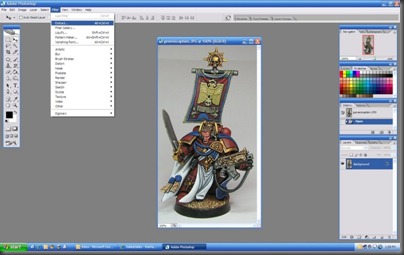
step150

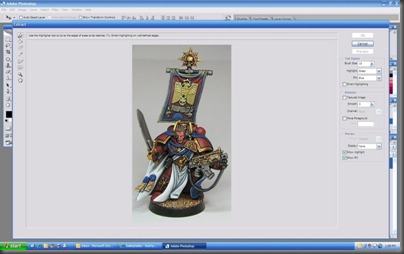
This will bring up the Extract window. In here you will use the tools on the left in combination with the parameters on the right to tell Photoshop what part of the image you want to keep
step250

Use the Edge Highlighter Tool on the left to highlight the edges of the section you wish to pull out of the image. You can define your Brush Size on the right. Adjusting the brush size helps Photoshop to better determine the 'edge' of what you want to keep. I like to turn on the Smart Highlighting feature as this makes it easier to highlight the edge and keeps the brush from straying if your hand isn't steady. Once finished it should look something like this...

step350

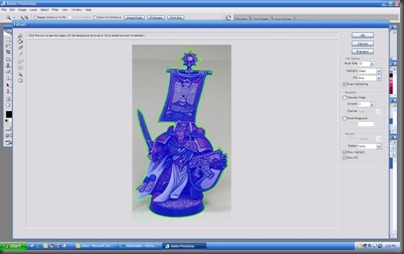
Next use the Fill Tool to fill in the area you wish to keep. This again is telling Photoshop which part / side of that green highlighting you wish to keep. Make sure the green highlighting is completely closed or else the whole image will get filled.
step450

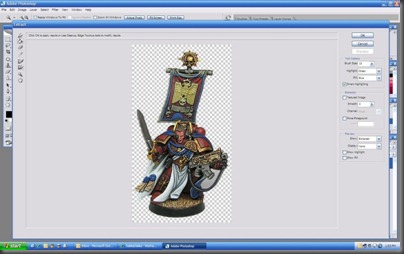
Now click Preview. This will give you a preview of what the image will look like. You can use some of the tools on the left to clean up the image or use the Clean Up Tool while holding down the Alt. key to bring back something that was mistakenly cut out.
step550

Once you're happy with the image click OK. This will take the extracted image and put it back into the main Photoshop window for further editing.

step650

Now all that's left is putting in the background you want. Here's a quick example.

final50

That's all there is to it. Enjoy! :)
Thursday, April 9, 2009

Demon Prince Final

Well, here it is. Still have to paint up the giant manreaper, but that is removable, and I have gotten some comments he looks better without it. Anyways, I think it's time to move on to another plague marine squad or even the dread. Hope you enjoy the pics!
~Grendel


Tuesday, April 7, 2009

Happy fun time with superglue!

As posted, one of the many projects I am currently working on is the DP for my death guard army. IMO, death guard armies are one of the best to experiment with regarding conversions and new paint methods. For example, the DP has his guts exposed. I could just do the usual red but I wanted to add some more to it. Hence, the title of this post. You can do more with superglue than just hold stuff together. The intestine were sprayed with zipkicker and drizzled with superglue in some spots. I like the results:


I'm adding some wash to the whole thing in a bit, give the globs some nice red tint to it. And just for reference, I tried to be lazy and mix the wash with the glue before applying it to the innards. It formed some kind of gelatinous mass that lunged at me (actually that could have just been the fumes messing with me, I'm not sure). Enjoy!
~Grendel
P.S. Yes, there is a nasty mold line on the space marine helmet. That eyesore will be covered up in the future.

Sunday, April 5, 2009

Some More Magnetic Joy!

I’m back in gear with making some hobby progress. I had a little bit of down time, but now I’m all ahead full. Coming down the line there will be posts on scenery for my RoBG, bringing my Genesis Chapter up to strength as well as Grendel posting updates to his Death Guard, so keep an eye out.

On topic… Awhile back I posted a ‘how to’ on magnetizing a Razorback. This is a small extension of that post. Since I’ll be using my Razorbacks as Rhino’s as well I wanted to make the appropriate interchangeable parts.

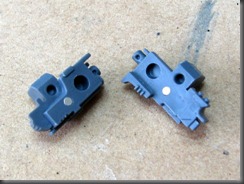
006 This picture shows the mount on which I can place a Storm Bolter or a Hunter Killer Missile. Conveniently enough this mount can be flipped upside down when I’m using the model as a Razorback without any of those two options.

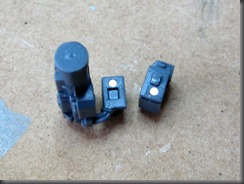
012 It’s so nice that the design of these bitz make it easy enough to magnetize for interchangeability. Here is the Storm Bolter. All I needed to do was use my pin vice to drill a small 1/16” hole in each side then press in the magnets.  Of course taking care to line everything up and making sure my magnet polarities were correct.

009 This is the Hunter Killer Missile. This bit took a small amount of thought to figure out a good way to magnetize it, but again the overall design made it easy. I chose to place the magnet above the fitment stud as the plastic anywhere else was to thin to drill. I used the same size magnets, 1/16” diameter by 1/32” thick.

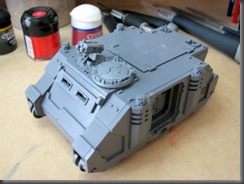
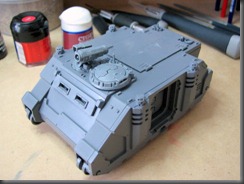
And the final results…

014 016 

Thanks for reading! :)

Friday, April 3, 2009

I need FOCUS!!!

Yeah, it's true. I do need to focus on one project before moving on to the next. I go with something for a bit, then have a bright idea, then I need to go with that idea, until something else tickles my fancy, then move on to that, and so on and so forth.......oh well.
I am making progress, albeit very slowly. I think I have solved my terminator dilemma. Me being me, I didn't really care much for the CSM terminator sculpts, plastic or metal. The imperial terminators were looking good, but then I had one of those ideas. I saw some fluff for the Death Guard involving the primarchs personal retinue, the Deathshroud. I really liked the look and wanted that for my chaos force. I grabbed a model that I thought was pretty close in resemblance, a Gray Knight terminator. Here's the results:


Second thing I've been working on are the actual plague marine squads. I have 2 metal plague marine squads, and I purchased a SM tact squad box. The tact squad is coming along nicely, with some odd bits and green stuff being worked into them. Here's the leader:


The demon prince is still being worked on as well, believe it or not. Painting is coming along, and I really can't wait to post the completed work. For the time being, here's another shot:


Actual proof that work is being done. In addition to the above works, I currently have 2 squads to paint, 3 rhinos, a dreadnaught, and whatever else may come up. Comments/suggestions welcome of course.
~Grendel

Recommended Posts

Blog Widget by LinkWithin