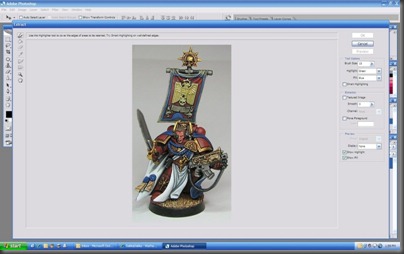
Not to long ago I made a post on Dakka Dakka about removing the background from an image using Adobe Photoshop. The more I thought about it the more I figured it would be nice to post it here as well. This particular tutorial uses version CS2, but applies to all versions 5.5 to present.
NOTE: If you are using CS4 you will need to install the ExtractPlus plug-in from the ‘Goodies’ folder located on the installation CD or download it from the Adobe website.
The Extraction Tool in Adobe Photoshop is a powerful tool that allow you to 'extract' a part of the image. Most commonly it's used for pulling out the primary object(s) from an image / removing the background.
Here's how it works...
Click Filter then Extract
This will bring up the Extract window. In here you will use the tools on the left in combination with the parameters on the right to tell Photoshop what part of the image you want to keep
Use the Edge Highlighter Tool on the left to highlight the edges of the section you wish to pull out of the image. You can define your Brush Size on the right. Adjusting the brush size helps Photoshop to better determine the 'edge' of what you want to keep. I like to turn on the Smart Highlighting feature as this makes it easier to highlight the edge and keeps the brush from straying if your hand isn't steady. Once finished it should look something like this...
Next use the Fill Tool to fill in the area you wish to keep. This again is telling Photoshop which part / side of that green highlighting you wish to keep. Make sure the green highlighting is completely closed or else the whole image will get filled.
Now click Preview. This will give you a preview of what the image will look like. You can use some of the tools on the left to clean up the image or use the Clean Up Tool while holding down the Alt. key to bring back something that was mistakenly cut out.
Once you're happy with the image click OK. This will take the extracted image and put it back into the main Photoshop window for further editing.
Now all that's left is putting in the background you want. Here's a quick example.
That's all there is to it. Enjoy! :)


Great tutorial - thanks for sharing. I'm going to try to figure out how to adopt your method for GIMP.
ReplyDeletegreat tutorial, I personally use paint.net and use the magic wand tool (?) to select the backround then delete it, seems to work fine
ReplyDeleteNice tutorial and I did not know there was such a plugin for Photoshop.
ReplyDeleteDon't forget the bolter belt though :p
I have CS4. Looks like I'll be downloading the plug-in tonight. Great tutorial! :)
ReplyDeleteThanks everyone.
ReplyDeleteHere is the link to download the plug-in for CS4:
http://www.adobe.com/support/downloads/detail.jsp?ftpID=4047
And I did notice a mistake in my post. This filter is only available for versions 5.5 to present. Sorry! :)
Does this work for Elements? Probably not I would guess.
ReplyDelete@eriochrome - I can't say for sure. I've not used Photoshop Elements since it's initial release, but I think there's a tool that's very similar called Magic Extractor. It should be located in one of the menues at the top of the screen.
ReplyDeleteJust so you know, I downloaded the plug-in ... and immediately put it to use extracting pictures of my wife and I from the backgrounds for use in the "MasterDarksol vs His Wife" image on the blog... haha, it works great. Thanks for the find!
ReplyDelete@Master Darksol - I read your battle report. Very nicely done, I enjoyed it a lot. I'm glad I could help in that little way. :)
ReplyDelete@oni - Awsome tutorial, thanks! It made it to my bookmarks, which is a rare occurance!
ReplyDelete